AMPM2015 conference report: Innovative materials, powder characterisation and metallographic testing
The AMPM conference series, sponsored by the Metal Powder Industries Federation (MPIF), was initiated in 2014 and ran in parallel with the PM2014 World Congress in Orlando, Florida. The second conference in the series was held in San Diego, California, from May 17-20, 2015. In this exclusive report for Metal AM magazine Dr David Whittaker reviews a number of key papers from the conference, ranging from a presentation on the activities of America Makes to developments in the production and characterisation of metal powders for AM. [First published in Metal AM Vol. 1 No. 2, Summer 2015 | 35 minute read | View on Issuu | Download PDF]
Metal AM at America Makes
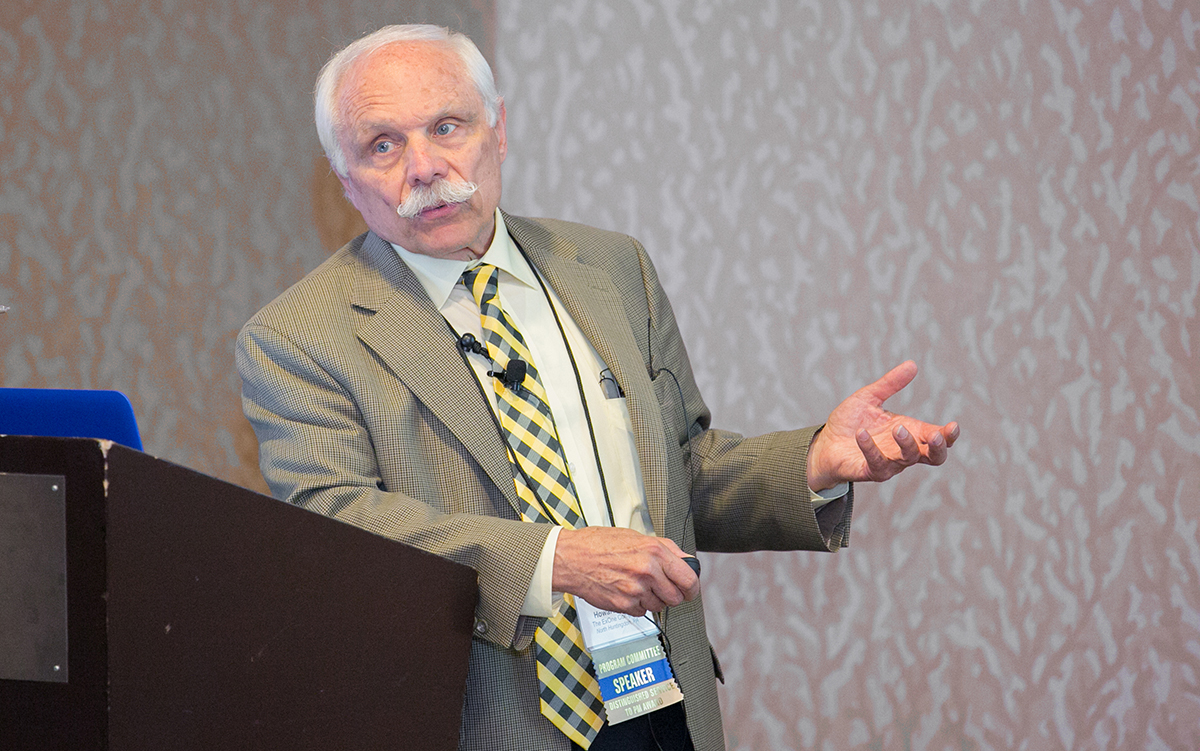
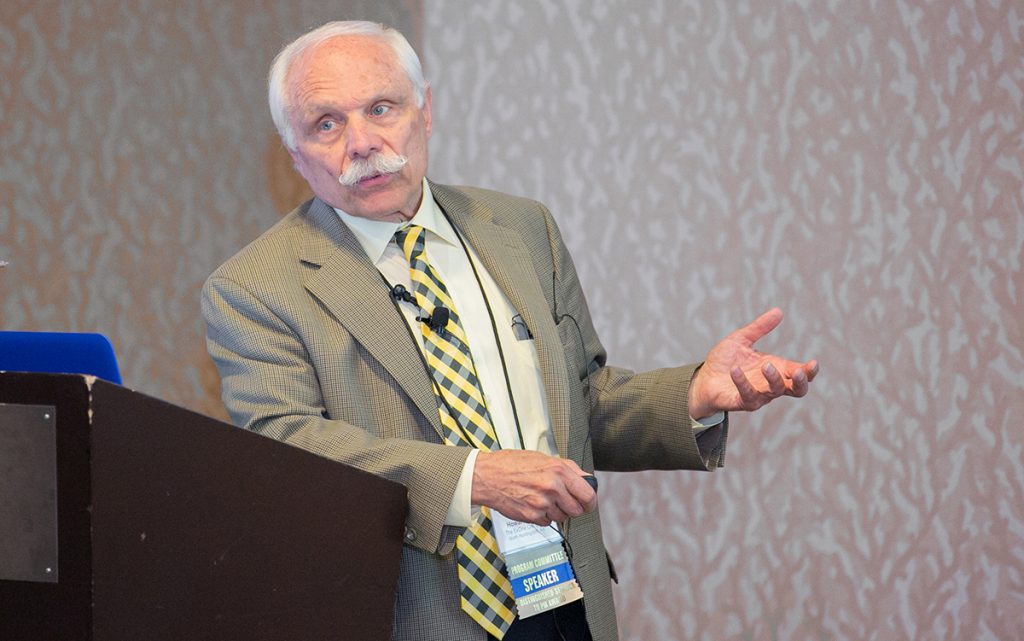
In his opening presentation at AMPM Howard A Kuhn, The ExOne Company, USA, and Technical Adviser to America Makes, provided a summary of the Powder Metallurgy for Additive Manufacturing projects that have been funded through the America Makes programme [1].
America Makes was established in Youngstown, Ohio, by the Obama administration as the USA’s first manufacturing innovation institute. It is a multi-agency collaboration and public-private partnership with a mission to pursue the widespread adoption of Additive Manufacturing. It was launched in August 2012 by the Air Force Research Laboratory and is led by the National Center for Defense Manufacturing and Machining (NCDMM), a non-profit company. The aim was to work on developments in the Technology Readiness Levels (TRLs) and Manufacturing Readiness Levels (MRLs) 4 to 7. Federal investment of $50 million was pledged to fund applied research projects and to support the development and management of the institute over a five-year period. Ultimately, it was envisaged that America Makes would be self-sustaining by August 2017.
America Makes has established an Innovation Factory containing ‘entrusted’ equipment covering the full gamut of AM technologies, including Selective Laser Melting, Binder Jetting, Selective Laser Sintering, material extrusion and direct metal deposition as well as specialist support activities such as plunge/dry EDM and metrology by laser scanning.
At the outset, the challenges to the full realisation of AM were identified and these have defined the technical agenda for project calls:
- Design: the need to think differently, to develop novel material combinations and geometries and to provide the tools to enable AM designs
- Repeatability, process qualification and certification: real push button repeatability incorporating acceptance and control
- Material characterisation: complete material properties, traceability to input materials
- Manufacturability and throughput: increased speed and size of AM equipment
- Production and life cycle cost: validated cost models.
To-date there have been three separate calls for project proposals. In the first call, which had an April 2013 start, six projects were awarded. These projects addressed both metals and polymers and covered the topics of materials characterisation, process capability and characterisation and quality control. The six projects involved a total of $9.5 million technical investment ($4.5 million Government funds + $5 million cost share) and each project included technology transition, advanced manufacturing enterprise development and workforce education. Thirty five participants were involved, including eight universities.
The second call awarded fifteen projects in January 2014. These involved the awarding $9 million of America Makes funding with $10.3 million matching cost share from awarded project teams.
The third call had a submission deadline of May 1, 2015 and is therefore still at the proposal evaluation stage. $8 million of government funding is earmarked for this call, with a stipulated maximum of $1 million support for each awarded project. The projects will run for a maximum period of 18 months and a 1:1 cost share is required. The stipulated technology areas will cover:
- Design: product and process design aides/apps
- Materials: Additive Manufacturing technical data packages, material property characterisation, next-generation materials
- Process: multi-material delivery and deposition systems, next-generation machines, process temperature gradient control
- Value Chain: advanced sensing and detection methods, intelligent machine control methods
- AM Genome: benchmark validation use cases, model-assisted property prediction, physics-based modelling and simulation.
Highlights from the first two project calls
A project on rapid qualification methods for powder bed direct metal AM processes has generated a process mapping methodology that can use knowledge on the influence of processing conditions on microstructure and consequent properties to predict product performance/life. Alternatively, the mapping can be used ‘in reverse’ to optimise process parameters for a desired outcome.
![Fig. 2 Modelling of distortions in metal powder bed AM [1]](http://www.metal-am.com/wp-content/uploads/sites/4/2022/07/02-6.jpg)
A project on the development of distortion prediction and compensation methods for metal powder bed AM has identified that intensive localised heating and extremely fast cooling in powder-bed processes lead to substantial residual stresses, distortion and cracking and that support structures restrain parts from moving, leading to lengthy post-processing and limits on complex geometries. Extensive modelling has been carried out to mitigate and predict distortion (Fig. 2).
![Fig. 3 Porous scaffolds in iron-based alloys [1]](http://www.metal-am.com/wp-content/uploads/sites/4/2022/07/03-7-1024x869.jpg)
A project on the Additive Manufacturing of biomedical devices from bioresorbable metallic alloys has demonstrated the building of complex implants from CT scan data and the 3D-printing of porous scaffolds from iron-based alloys (Fig. 3) and magnesium-based alloys.
![Fig. 4 LENS Engine system in preparation for America Makes Open House [1]](http://www.metal-am.com/wp-content/uploads/sites/4/2022/07/04-7-951x1024.jpg)
A low cost Optomec LENS® Print Engine™ has been developed that will enable metal laser deposition equipment to be installed as an accessory on a machine tool base (Fig. 4). Finally, the efficient design of Additive Manufactured cellular structures (Fig. 5) has been explored, using a methodology that comprises homogenisation, topology optimisation and topology reconstruction.
![Fig. 5 Designed AM cellular structure [1]](http://www.metal-am.com/wp-content/uploads/sites/4/2022/07/05-4-1024x592.jpg)
The presentation concluded with a description of America Makes’ current expansion concept. This will involve the establishment of a network of regional satellite centres with links to the central institute. These satellite centres will provide a regional footprint and will be charged with pursuing technology development, technology transition, the establishment of “advanced manufacturing enterprises” and workforce education and training.
Novel materials for metal Additive Manufacturing
Two papers for review from AMPM2015 addressed the topic of unique materials for Additive Manufacturing.
Magnesium alloys by AM
Rajiv Tandon, Magnesium Elektron Powders, USA, and Todd Palmer, Pennsylvania State University, USA, described an investigation into process development and mechanical properties related to the Additive Manufacturing of a rare earth containing magnesium alloy, Elektron®43, using directed laser energy deposition [2].
Magnesium based alloys are used in various applications such as the aerospace, automotive and 3C (computer, communication and consumer electronics) industries. These applications are driven largely by a necessity for weight savings due to the low density and high specific stiffness of magnesium. More recently, magnesium alloys have also been investigated as promising materials for biomedical implants due to their biocompatibility, biodegradability and an elastic modulus that is closer to human bone than those of conventional implantable materials such as cobalt and titanium based alloys.
AM offers the potential for topology optimisation and component integration, both of which are essential for achieving weight reduction beyond what is possible by other traditional manufacturing routes. AM can also be used to custom design magnesium based implants with defined cellular structures such as scaffolds, which could allow full vascularisation of implants.
There are relatively few published studies on the AM of magnesium and the most commonly investigated AM process for magnesium is the laser powder bed process. There have been no published studies investigating the use of Directed Energy Deposition (DED), also known as blown powder AM or laser cladding, using magnesium alloy powders.
The rare earth containing alloy Elektron®43, with a nominal composition of Mg-4%Y-2%Nd-0.5%Zr, is widely used in applications where a combination of high strength, high temperature creep resistance and good general corrosion resistance is desired. In addition, variants of this alloy have been used for biomedical research as resorbable implants. Therefore, the aim of the reported investigation was to study the DED process using the Elektron®MAP+ 43 powder and to develop a basic understanding of its processing behaviour.
Gas atomised spherical Elektron®MAP+43 powder (100/325 mesh) with a mean particle size of 90 µm, a powder specially developed for AM processing, was used for this investigation. The Directed Energy Deposition (DED) experiments were performed in a custom-fabricated deposition system, shown in Fig. 6. This system has a customisable build volume and can handle rectilinear builds, up to 1000 mm long, 300 mm wide and 450 mm high, and utilises an open architecture for easy synchronisation and control of all system variables.
![Fig. 6 The High Productivity High Deposition System used in the investigation [2]](http://www.metal-am.com/wp-content/uploads/sites/4/2022/07/06-5-1024x334.jpg)
During processing, the chamber was purged with ultra-high purity argon to attempt to maintain oxygen levels between 60 and 110 ppm in the chamber. The laser power was delivered from an ytterbium fibre laser and powder was delivered using a custom designed four nozzle powder delivery system. The substrate was placed at a location approximately 10 mm from the nozzles, which corresponds to the focus point for the powder flow. At this location, the laser beam is in a defocussed position and has a measured beam diameter of approximately 4 mm.
A series of process development builds was fabricated to examine the role that changes in laser power, travel speed and powder flow rate have on the properties of the Mg deposits. A summary of the processing parameters used in the development is given in Table 1. The individual builds were characterised by extracting a cross section from the linear build and analysing the changes in micro-hardness levels, grain size and pore volume.
![Table 1 Processing Parameters Investigated in Directed Energy Deposition [2]](http://www.metal-am.com/wp-content/uploads/sites/4/2022/07/t01-3-1024x466.jpg)
It was found that high laser power, in the range from 1750 to 2250 W, was necessary to achieve good quality deposits with densities exceeding 99%. The results of the process development window study are shown in Table 2. These results showed that some grain coarsening occurred as a result of re-melting and solidification of the powder (for reference, the grain size of the starting powder was measured to be approximately 2 µm). The pore volume data showed that a high deposited relative density of > 99% of theoretical could be achieved. The micro-hardness of the deposited layer ranged from 76 Hv to 81 Hv, which was slightly lower than the micro-hardness of the starting powder, measured to be 96 Hv.
![Table 2 Microhardness, grains size and pore volume of the window study [2]](http://www.metal-am.com/wp-content/uploads/sites/4/2022/07/t02-2-1024x465.jpg)
Based on these results, a laser power of 2250 W, a travel speed of 63.5 cm/min, with an overlap of 2.032 mm and a z-height offset of 1.27 mm was selected for further evaluation. These parameters were used to fabricate wall structures on an Elektron®43 substrate of 15.2 cm x 15.2 cm x 1.27 cm as shown in Fig. 7. A series of rectangular build geometries 7.6 cm (L) x 5.08 cm (H) x 1.27 cm (W) and 15.2 cm (L) x 5.08 cm (H) x 1.27 cm (W) were fabricated, from which tensile and metallographic samples were extracted and tested from selected orientations.
![Fig. 7 Laser directed energy deposited samples (a) and machined to extract tensile specimen in a vertical orientation (b) [2]](http://www.metal-am.com/wp-content/uploads/sites/4/2022/07/07-4-1024x311.jpg)
After the DED process, some of the samples were Hot Isostatically Pressed (HIPed) using a cycle which was specifically designed to minimise grain growth while achieving 100% densification. Two different types of heat treatment were also investigated. The first involved an artificial aging or T-5 at 250°C for 16 hours while the second involved a T-6 (a solutionising step at 525°C for 2 hours followed by aging at 250°C for 16 hours). Both the as-deposited and HIP samples were subjected to the T-5 and T-6 treatments.
Metallographic examination of the deposited material showed that pores were present as clusters rather than being randomly distributed and a closer inspection showed that these pore clusters were aligned with the overlapping regions of the deposit, where re-melting and re-solidification of the previously deposited layer had occurred. The microstructure also showed the presence of features, described as ‘skin clusters’. These were identified using scanning electron microscopy and are shown in Fig. 8(a). These clusters were randomly present throughout the microstructure including in the HIPed and heat treated samples. However, the pores were eliminated by Hot Isostatic Pressing and the fully dense microstructure of a HIPed part is shown in Fig. 8(b). The ‘skin clusters’ were identified as being features that were rich in Y and Zr. On the other hand, Nd appeared to be well distributed in the matrix and no Nd segregation was observed. There were also no oxide rich phases in these zones, despite the presence of a thin oxide passive film on the starting powder surface. At this point, the reasons for the segregation of Y and Zr into these ‘skin clusters’ are still under investigation.
![Fig. 8 SEM micrographs showing (a) “skin clusters” in as-deposited sample and (b) fully dense microstructure of a HIPed sample [2]](http://www.metal-am.com/wp-content/uploads/sites/4/2022/07/08-4-1024x345.jpg)
The mechanical properties of the as-deposited, HIPed and heat treated samples are listed in Table 3. These results show that the artificial age (T-5 cycle) did not result in any changes to the as-deposited properties, implying that the cooling rate in the deposition process was slower than the critical cooling rate that is required to produce this effect. Similarly, a T-5 treatment after HIP did not result in any change. By comparison, the T-6 treatment restored the aging response and improved yield strength, UTS and elongation. This resulted from the dissolution of the Y and Nd-rich precipitates into solid solution and re-precipitation within the grains during the aging cycle. However, some regions of the T-6 microstructure showed the evidence of isolated grain coarsening.
![Table 3 Mechanical properties of the directed energy deposited sample under various condition [2]](http://www.metal-am.com/wp-content/uploads/sites/4/2022/07/t03-2-1024x599.jpg)
The mechanical test results also showed that the samples extracted and tested from a horizontal orientation resulted in higher elongation than those machined and tested from a vertical orientation, although the yield strength and UTS remained essentially unchanged. The overall mechanical properties obtained compared very favourably with those of typical cast WE43B alloy used in aerospace applications.
The results of this study have shown that a DED setup, which is similar to commercially available systems, can be used to deposit magnesium alloy powders. The basic steps and methodology that were taken into consideration can be used as a platform to develop more elaborate protocols for scaling up. Further refinement of the processing parameters may be necessary to mitigate the porosity clusters that were observed in the overlapping regions of the deposit. It is believed that the elimination or reduction of these pores and skins can lead to further improvement of the mechanical properties.
Development of a maraging steel powder for AM
Simon Hoeges, GKN Sinter Metals GmbH, Germany, and Christopher Schade and Robert Causton, Hoeganaes Corporation, USA, described the development of a maraging steel powder for AM [3].
To extend the possible range of AM applications to small series production for instance, the cost of the technology needs to be reduced by increasing productivity. A further limitation is the availability and cost of materials for AM. The focus of research to-date has been on the use of gas atomised high alloy powders, which are generally preferred because of the spherical nature of the powder. However, water atomisation is the most common and economical production technique for metal powders and, if a low water to metal ratio is used in water atomisation along with a high pressure, a spherical powder with a particle size distribution optimised for Additive Manufacturing can be produced. To ensure uniform and consistent part build, powders must also have consistent flow and high packing density.
One alloy that has seen considerable interest is a maraging steel (Table 4). This steel, which uses nickel as the primary strengthening element rather than carbon, is known for its superior strength and toughness. Despite its high strength, the material can be easily machined or formed and, after these treatments, it can undergo an aging (heat treatment) step that forms intermetallic precipitates involving cobalt, molybdenum and titanium, which aid in increasing the tensile strength. Due to the high nickel content, the alloy has high hardenability and has wear resistance that is suitable for many tooling applications. The material can be heat treated in air at low temperatures and, because of the low thermal coefficient of expansion, has excellent dimensional stability. The low carbon content also helps when used in SLM, since the material is not susceptible to thermal stress cracks during cooling.
![Table 4 Chemistry specification for Maraging Steel (DIN 1.2709) [3]](http://www.metal-am.com/wp-content/uploads/sites/4/2022/07/t04-2-1024x119.jpg)
The chemistry for the maraging steel, as shown in Table 4, was developed for wrought alloys. A troublesome feature of this chemistry is the use of titanium. Titanium has a high affinity for oxygen and forms stable solid oxides at the melt temperature. A feature of the atomisation process is that the metal must be poured through a nozzle with a fairly small orifice (4-8 mm). The oxides tend to adhere to the pouring nozzle and stop the metal flow. This pour flow can have an impact on the shape and particle size of the powder. This is not such an issue in conventional casting of this alloy as, normally, large ingots or castings are made that have larger flow paths. In order to optimise the flowability of this alloy, an experimental alloy has been made to replace the titanium in the alloy with niobium. Niobium has a lower affinity for oxygen and, in many PM alloys such as 17-4PH and 434Cb, is a standard replacement for titanium. Because of this lower affinity for oxygen, the oxides to do not form on the pour tube and atomisation occurs without slow down or interruption. The lower affinity for oxygen may also lead to lower oxide inclusions during the SLM process.
For this study, a 1.2709 maraging steel was water atomised with pressures around 45 MPa and with niobium replacing titanium. The material was then sieved to closely match the particle size distribution of gas atomised powder. This material was then compared to a commercially available gas atomised 1.2709 with titanium. Additive Manufacturing was carried out using the Selective Laser Melting process in a Renishaw AM 250 machine. Tensile and impact specimens were machined from both as-built and aged specimens.
![Table 5 Chemistry of water atomised versus gas atomised 1.2709 tool steel [3]](http://www.metal-am.com/wp-content/uploads/sites/4/2022/07/t05-1024x131.jpg)
![Table 6 Chemical and physical properties of maraging steel, gas versus water atomised [3]](http://www.metal-am.com/wp-content/uploads/sites/4/2022/07/t06-1024x164.jpg)
The chemical composition of the water atomised powder versus the gas atomised powder is shown in Table 5 and the physical properties of the two powder types are shown in Table 6. The water atomised powder had a slightly finer particle size and higher apparent density (Table 6) than the gas atomised powder, but a higher oxygen content. Development work is ongoing to lower the oxygen content.
As shown in Table 6, the flow of the particles could not be measured using conventional Hall Flow testing and a different methodology needed to be used for the characterisation of the particle flow. Therefore, the Powder Revolution Analyser (Fig. 9) has been used, with system settings Rotation Rate = 0.3 U/min, Numbers of Avalanche = 150, Drum size=50.
![Fig. 9 Schematic of the (a) Revolution Powder Analyser © Mercury Scientific Inc (b) powder deposition process during Additive Manufacturing [3]](http://www.metal-am.com/wp-content/uploads/sites/4/2022/07/09-4-1024x288.jpg)
The avalanche angle is a characteristic parameter when compared with the process of powder deposition (Fig. 9b). The average avalanche angle has been chosen as the preferred parameter to describe powder flow. Fig. 10 shows the results for three measured powders. Water atomised pure iron powder (WA-Fe-Powder) was measured, since the flowability of the powder has been proved to be sufficient to be processed in the AM machine without changes to the powder deposition device. This can be seen as a minimum requirement for processability in SLM. Gas atomised maraging steel has also been measured, as this is the powder most widely used for AM. The avalanche angle differs by only around 1° between the water atomised and gas atomised powders.
![Fig. 10 Average avalanche angle of analysed powders [3]](http://www.metal-am.com/wp-content/uploads/sites/4/2022/07/10-3-1024x509.jpg)
For the deposition of layers of the water atomised tool steel powder during powder-bed AM, a flexible silicone device is used. Powder layers generated with water atomised powder showed qualitatively similar characteristics to gas atomised powder during powder deposition. A vibration device was not necessary to achieve a reproducible dense powder layer without defects or disturbance.
For the production of parts from a gas atomised maraging steel, a set of process parameters has been developed to achieve high density (99.5% rel. density). The process parameters of exposure time and hatch distance need to be varied to achieve the same results with water atomised powders. Parameters have been chosen for further production of test parts which result in highest density (8.07 g/cm³). The test geometries for tensile test and Charpy V-notch test have then been produced in one production batch, each producing thirty parts. The part distribution on the base plate is shown in Fig. 11.
![Fig. 11 Overview of build jobs for 30 specimens for tensile test (left) and Charpy V-notch test (right) [3]](http://www.metal-am.com/wp-content/uploads/sites/4/2022/07/11-2-1024x518.jpg)
The mechanical properties of the water and gas atomised powders are shown in Table 7. The test specimens referred to in this table have been aged at 490°C for six hours. The specimens built from water atomised powder had lower ultimate tensile strength and hardness than the specimens built from gas atomised powders. The ductility, as measured by the impact and elongation values, was also lower for the water atomised specimens. However, the niobium level in the 1.2709 water atomised powder was much lower than the titanium in the gas atomised powders (0.35 versus 0.96 wt%), which may have limited the number and size of the precipitates that form.
![Table 7 Mechanical properties of gas and water atomized 1.2709 in the aged condition (490°C for 6 hrs) [3]](http://www.metal-am.com/wp-content/uploads/sites/4/2022/07/t07-1024x163.jpg)
It has also been found that in water atomised powders utilising precipitation hardening, because of the finer grain size of the powders, the aging time to reach peak strength and hardness is generally lower than that utilised for coarser grained materials such as the gas atomised powder. Currently, aging time studies and TEM (Transmission Electron Microscopy) are being performed to gain a better understanding of the differences in mechanical properties. Additional water atomised powders with refined chemistry will be made after this analysis is complete.
The authors have concluded that although the parameters for SLM of water atomised powders had to be modified, it was shown that water atomised powders can be successfully utilised. The powder size, morphology and flowability showed little difference between water and gas atomised powders. The Revolution Powder Analyser for quantifying the flowability of AM powders has been successfully tested in order to build the foundation for possible standardisation. The behaviour of the powder during AM laser powder bed processing showed no difference between the gas and water atomised powders. Minor changes to the process parameters were necessary to achieve the same high density. In addition, the replacement of titanium with niobium seems to be a viable approach to make the powder more conducive to both atomising and the SLM process. Further refinement of the chemistry, processing parameters and heat treatment are underway to improve the mechanical properties of the water atomised (niobium containing) 1.2709 tool steel powder.
Powder characterisation, re-use and metallographic testing in metal AM
As metal AM moves away from its prototyping origins into serial production, the ability to re-use powder lots that have already previously been in the chamber during a component build run has emerged as an important issue in relation to the cost-effectiveness of the AM process. Two papers at the conference therefore focused on methods suitable for characterising previously used powder lots in order to ascertain their suitability for re-use.
The characterisation of powder lots for initial use and re-use in AM
John Yin and Mike Delancy, Freeman Technology Inc., USA, and Tim Freeman, Jamie Clayton, Katrina Brockbank and Doug Millington-Smith, Freeman Technology Ltd., UK, discussed the characterisation of powder lots, both for initial use and re-use in AM [4].
Freeman Technology has recognised that traditional powder characterisation techniques, such as Angle of Repose and Flow through a Funnel tests, are well-documented, but are often incapable of quantifying subtle differences between powders. Similarly, relying on a particle size alone is not always an appropriate way to assess the suitability of a powder. The company has consequently found that powder rheology allows the measurement of dynamic flow and shear properties as well as quantifying bulk properties such as density, compressibility and permeability. These data can be correlated with process experience to improve efficiency and enhance quality. This presented paper was based on two case studies, the first assessing changes in powder supplier and production methods and the second investigating the use of recycled material. The second of these case studies is reviewed here.
To fully understand why materials behave differently in AM processing, it is necessary to study their response to a range of stimuli that represent the stress and flow regimes experienced in the process. To do this, Freeman has developed its own equipment and technology, the FT4 Powder Rheometer®, shown in Fig. 12 (left), to evaluate powder rheological properties. Fig. 12 centre and right identify how the rheometer results can be used to define total flow energy for the tested material.
![Fig. 12 Measurement of flow energy using the FT4 Powder Rheometer® [4]](http://www.metal-am.com/wp-content/uploads/sites/4/2022/07/12-1-1024x335.jpg)
In the case study related to the process-relevant differences between fresh and used AM feedstocks, it was recognised that re-use requires an understanding of the extent to which a powder has been altered by the AM process and whether it can be safely re-used without compromising the quality of the finished component.
Feedstocks containing differing proportions of virgin and used powder were evaluated using the powder rheometer to determine whether characteristics of the used powder differed from those of the virgin material. Strategies to return the used powder to a condition that would enable successful re-use were then considered. The results show that AM processing had significantly increased the basic flow energy of the used powder (Fig. 13) suggesting that it is likely to perform differently in the process.
![Fig. 13 Using powder rheology to optimise the use of recycled materials [4]](http://www.metal-am.com/wp-content/uploads/sites/4/2022/07/13-1-1024x662.jpg)
It is recognised that powder scavenged from an AM machine may contain splatter from the melt pool. Experiments were therefore undertaken to determine whether sieving would return the flow energy of the used powder to its previous value. However, this ultimately proved to have little impact. Further experiments were then conducted to ascertain whether a blend of used and virgin powder could replicate the behaviour of the virgin material. It was found that a ratio of 75% virgin to 25% used powder produced a basic flow energy value most similar to that of the virgin powder and this was considered to be a viable re-use scenario.
Interestingly, the 50:50 blend had the highest basic flow energy of all the blended samples, demonstrating that flowability does not change linearly with respect to the quantity of virgin powder present. It is therefore not possible to predict performance from knowledge of the blend constituents alone.
Powder characterisation methods
John D Hunter, LPW Technology Inc., USA, defined the company’s approach to addressing the powder quality and characterisation issues considered critical to professional Additive Manufacturing [5]. The use of virgin powder and the re-use of powder lots were both considered.
LPW Technology was established in 2007 in the UK by Dr Phil Carroll, who had identified a gap in the market for a specialist supplier of metal powders for the various AM process technologies. LPW strengthened its service offering in North America by opening LPW Technology Inc. in June 2014 and, in 2015, significant investment in capital equipment underscored the company’s position as a leading supplier to the AM industry.
The LPW Technology group is involved in powder supply, consultancy and R&D. Its established AM metal powder supply position is strengthened by a focus on the development of new alloys and solutions and of systems to support the management and re-use of powder lots. The presentation proceeded to highlight a number of the company’s key powder characterisation methods.
Inert Gas Fusion (using LECO –ONH 836 equipment) is used to quantify levels of interstitial elements (oxygen, nitrogen, hydrogen) in a number of important alloy systems. Powder flow rate is characterised using the Hall Flow method. Flow rate has an impact on the quality of the recoat layer and can cause porosity or build failure. In some cases, poor flowing powder will result in the dosing system’s failure to operate.
Particle size distribution (circular equivalent diameter) is measured using a Malvern Mastersizer 3000 dry feed, laser size diffraction system. Particle size distribution directly influences powder flow and packing density and also has an influence on the absorptivity of the target layer to be melted. Particle shape is also characterised, using Malvern Morphologi G3 equipment, through a range of parameters including Aspect Ratio, Convexity and Circularity:
- Aspect Ratio = width/length
- Convexity = Convex Hull Perimeter (b)/Actual Perimeter (a) (Fig. 14)
- Circularity = Actual Perimeter (a)/Circular Equivalent Perimeter (c) (see Fig. 14) .
- Particle shape also had a direct influence on powder flow and packing density and on the absorptivity of the target layer.
![Fig. 14 Parameters relevant to particle shape characterisation [5]](http://www.metal-am.com/wp-content/uploads/sites/4/2022/07/14-1-1024x349.jpg)
A number of case studies of powder degradation results were presented to demonstrate how powders change with repeated re-use and to determine how many times a material can be re-used before it is deemed to be out of specification. As the powder particle size distribution changes as it is re-used, occasional screening is done to bring it back into specification. Once this is done, it spreads evenly in the machines enabling additional parts to be manufactured.
![Fig. 15 Influence of repeated re-use cycles on the mechanical properties of SLM processed IN-718 [5]](http://www.metal-am.com/wp-content/uploads/sites/4/2022/07/15-1-1024x567.jpg)
After re-use, the chemical composition of powders, particularly in relation to interstitials, can change and this has a potential to create detrimental effects on final mechanical properties. For instance, a continuous increase in the oxygen content of IN-718 nickel superalloy (e.g. from an original 0.016 wt% by an additional 0.0001 wt% per SLM cycle) generates the changes in mechanical properties, shown in Fig. 15. The initial study only covered 14 build cycles due to project funding limits and demonstrated that the oxygen content rose. The second study went much further, with over 40 build cycles, demonstrating that the material would eventually result in poor mechanical properties of the as-built parts. However, it is possible to keep it within specification through the addition of virgin powders and/or returning the powder to LPW for reprocessing and reduction of the surface oxides.
![Fig. 16 Control of particle size distribution in the re-use of Ti-6Al-4V powders [5]](http://www.metal-am.com/wp-content/uploads/sites/4/2022/07/16-1-1024x678.jpg)
Particle size characterisation has demonstrated a high level of capability for the accurate control of particle size distribution through multiple re-use cycles (Fig. 16). However, particle size distribution is not the only significant factor; particle morphology is also important. Presented results for Ti-6Al-4V (Figs. 17 and 18) showed that, on repeated re-use, the particle shape was becoming more circular and more convex. The consequent changes in mechanical properties are shown in Fig. 19. While the powder was becoming more circular, it also became more convex, i.e. more fissures in the particles. Initially, the greater circularity improves flow, although it implies that, over time, the greater convexity could lead to other issues such as porosity.
![Fig. 17 Increasing circularity of Ti-6Al-4V powder lots through repeated re-uses [5]](http://www.metal-am.com/wp-content/uploads/sites/4/2022/07/17-1-1024x680.jpg)
![Fig. 18 Decreasing convexity of Ti-6Al-4V powder lots through repeated re-uses [5]](http://www.metal-am.com/wp-content/uploads/sites/4/2022/07/18-1-1024x677.jpg)
LPW stated that its PowderSolveTM software system allows users to track the changes in the powder characteristics, (morphology, flow, chemistry, etc.), resize or correct as possible and when not possible enables the user to change out and recycle the powder. This change is done before making a build, which would result in a failed run, or unacceptable part property.
![Fig. 19 Influence of repeated re-use cycles on the mechanical properties of Ti-6Al-4V AM specimens [5]](http://www.metal-am.com/wp-content/uploads/sites/4/2022/07/19-1024x464.jpg)
Metallographic testing methods
Finally, powder characterisation was also the focus of a paper from Tom Murphy, Hoeganaes Corporation, USA, which considered metallographic testing methods for powders intended for use in AM [6].
Metal powders used in AM are required to have a different set of physical particle characteristics compared with the more traditional Powder Metallurgy grades. The desired particle size distribution is finer and the shape nearly spherical, in contrast to the PM grade particles that are larger in size and more irregular in shape. The fine, nearly spherical particles are desired since they flow faster, with more uniformity, and fill the AM powder beds more efficiently.
The combination of the small size, spherical shape and minimal particle surface to material volume ratio can often lead to particles being pulled out of the mount during grinding and polishing. This unfavourable situation is compounded when extracted particles become embedded in polishing cloths, thus creating scratches, gouges and deformation on the surface being prepared. Consequently, a new metallographic preparation procedure was developed. The recommended procedure involves the following steps.
Acquisition of a representative powder sample
While many techniques can be used to select a random sample, the best methods conform to accepted standards, such as MPIF Standard 01 or ASTM Standard B215. The selected powder sample must be typical of the powder mass and the sample size should be sufficiently large to allow for preparation and testing of additional samples.
Mounting in a liquid epoxy resin
To make epoxy mounts, the resin should be prepared as normal, then combined with a small amount of the subject metal powder. Care must be taken not to entrap air in the viscous liquid/metal mixture while folding or stirring. Due to the particle size distribution of the metal powders and the high viscosity of the epoxy, segregation of the coarse particles is often not severe, with many of the particles remaining suspended in the viscous epoxy. This helps ensure that a more representative selection of the distribution will remain in the mount for analysis.
Grinding
Grinding is then used to establish the plane for polishing and to expose the particle cross-sections. This should be accomplished using a single fine grinding step, e.g., 600 grit SiC. The use of light pressure is recommended and, in many cases, the grinding would be performed manually.
Polishing
Polishing can then be achieved successfully using a two-step vibratory polishing sequence. This is a combination of a coarser polish on a ‘hard’ cloth, followed by a final polish on a napped cloth for a short time. Although the time required for the first step is lengthy (often hours are required to remove the evidence from the grinding step), the second step, the final polish, can usually be accomplished in 5 to 15 minutes.
Once metallographic samples have been prepared, the author then recommended the use of automated image analysis techniques to evaluate the shapes and surface textures of the particles. Shape and texture are important factors in the behaviour of the powder mass during the AM process. The shape affects the ability of the particles to fill the powder bed and impacts on the flow, possibly slowing or creating more erratic flow behaviour if the particles deviate from a spherical shape. Surface texture influences inter-particle friction and also may significantly alter powder flow and bed fill.
In the reported work, three approaches to evaluating particle shape and texture were assessed:
- Combining individual measurements, i.e., length, width, area, perimeter, various diameters, etc., into ratios, such as Aspect ratio (length / width) or Roughness (convex perimeter / perimeter)
- Using combinations of areas, perimeters, lengths, etc. in comparison with a geometric shape, in this case, a circle. Relevant parameters here include Circularity (4πA) / perimeter2), Compactness (4πA ) / convex perimeter2), Roundness (4 A) / (π max feret diameter2) and Excess Perimeter (perimeter – PAeq x 100 where PAeq = perimeter of an area equivalent circle)
- Reduction of 2D feature data into a 1D graphic and statistical representation by measuring incrementally spaced radii from the feature centroid, plotting the results on an x/y graph and examining the statistical data.
For the examination of the radius function, the feature cross-sections are defined and the centroid of the each is determined. Radii are then drawn from these centroids. In the reported analyses, 30 radii were incrementally spaced at 12° intervals, as seen in Fig. 20, with the 0° location defined. In this way, the shapes of the features were determined by variation in the radius lengths.
![Fig. 20 Example of a defined feature cross-section containing the 30 radii. The 0° radius is located and the angular movement is counter-clockwise [6]](http://www.metal-am.com/wp-content/uploads/sites/4/2022/07/20-1024x786.jpg)
In the automated image analysis system used to generate the shape analysis data, procedural decisions were made to determine both the magnification needed to provide images of the small particles and the technique needed to separate particles in the metallographic mount that might be touching due to coincidence of location on the prepared surface.
In deciding on the magnification required to image the small particles, a 50 x objective lens was chosen with a corresponding 0.139 µm/pixel resolution. At this magnification, the particle cross-sections and surface details were visible. Fig. 21 shows a typical field of a metallographically prepared maraging steel powder at this magnification.
![Fig. 21 Cross-sections of a maraging steel powder metallographically prepared and imaged (unetched) [6]](http://www.metal-am.com/wp-content/uploads/sites/4/2022/07/21-1024x779.jpg)
A sequence of image transformations was written into the automated analysis software to separate the digital representations of particles that appeared to be touching at a linear distance of <3.75 µm, while multiple particles with more shared surface remained joined. In this way, satellites and protrusions would remain part of the particle, while unattached particles were separated. The reported results indicated that, although all of shape parameters defined above proved to be effective, some were more useful with specific particle types and, also, some expressions may be more robust than others. It was therefore recommended that multiple criteria should be used in an analysis and that, with an automated system, many measurements can be made without a significant increase in analysis time. Examples of both successful and less than successful analyses are presented in Figs. 22 and 23. In both of these figures, two different gas atomised 316L stainless steel powder samples were compared. The powders were produced by the same manufacturer at different times and were given the designations 001 and 002. Fig. 22 compares the results of aspect ratio testing. It is clear that this ratio was not applicable to this powder type and, regardless of other shape differences, the length and width measurements were not significantly different within the populations of particles examined in each sample. On the other hand, Fig. 23 shows the results of Circularity and Compactness assessments. It is clear from this figure that the 001 powder sample is rounder when judged by Circularity, with the dashed blue line positioned a significant distance to the right of the dashed red line. The difference in Compactness is only seen with a shape factor value of >0.65, with the two solid lines diverging a measurable amount after that point.
![Fig. 22 Aspect ratio results from the testing of gas atomised 316L powder samples 001 and 002. The results are shown as cumulative plots of the frequency distributions [6]](http://www.metal-am.com/wp-content/uploads/sites/4/2022/07/22-1024x655.jpg)
![Fig. 23 The results of circularity and compactness testing of gas atomised 316L powder samples 001 and 002. The results are shown as cumulative plots of the frequency distributions [6]](http://www.metal-am.com/wp-content/uploads/sites/4/2022/07/23-1024x607.jpg)
Finally, Fig. 24 shows the usefulness of radius function analysis on four chosen particles (Number 1 was pear-shaped, 2 appeared to have secondary solidification on the lower right side, 3 was nearly round and 4 was roughly triangular). Images of the particles, x/y graphs of the radius length at specific angles and statistics of mean, standard deviation and the coefficient of variation (C.V.) are included in Fig. 24.
![Fig. 24 The four particles chosen as examples of the radius function from an analysis field [6]](http://www.metal-am.com/wp-content/uploads/sites/4/2022/07/24-574x1024.jpg)
The graphs showing the change in radius length appear to be characteristic of the basic shapes. Particle 1 has two high points and dips in the graph as an elongated, pear-shaped particle. The erratic shape of the graph for number 2 is characteristic of the irregular perimeter from the secondary solidification region on the lower right edge. Particle 3 is nearly round, with an almost flat graph. As with particle 1, the curve for particle 4 also appears to be cyclic, although with a different period due to the triangular shape. In examining the statistical functions to the right of the graphs, the variation in radius length is reflected in the standard deviations and coefficients of variation. Particle 4 is smaller in size compared with the other three, but the C.V. shows a high variation in the radii lengths. The C.V. is a measure of the dispersion of the frequency distribution and is a valid comparison even though the particles are of different sizes. It can be seen that, as the cross-sections become rounder and smoother, the standard deviation and C.V. have lower values.
Author
Dr David Whittaker
231 Coalway Road
Wolverhampton
WV3 7NG, UK
Tel: 01902 338498
Email: [email protected]
References
[1] Kuhn, H. America Makes Projects on Powder Metallurgy for Additive Manufacturing, AMPM2015 Conference, May 17-20, 2015, San Diego, California, USA
[2] Tandon, R, et al. Additive Manufacturing of Elektron®43 Alloy Using Directed Laser Energy Deposition: An Investigation into Process Development and Mechanical Properties, AMPM2015 Conference, May 17-20, 2015, San Diego, California, USA
[3] Hoeges, S, et al. Development of a Maraging Steel Powder for Additive Manufacturing, AMPM2015 Conference, May 17-20, 2015, San Diego, California, USA
[4] Freeman, T. Enhancing the Use and Re-Use of Metal Powders for Additive Manufacturing, AMPM2015 Conference, May 17-20, 2015, San Diego, California, USA
[5] Hunter, J. Powder Quality and Characterization Critical to Professional Additive Manufacturing, AMPM2015 Conference, May 17-20, 2015, San Diego, California, USA
[6] Murphy, T. Metallographic Testing of Powders Intended for Use in Additive Manufacturing, AMPM2015 Conference, May 17-20, 2015, San Diego, California, USA
AMPM2016
AMPM2016, the third in the Additive Manufacturing with Powder Metallurgy Conference series, will be co-located with the 2016 International Conference on Powder Metallurgy & Particulate Materials, June 5–8, 2016, in Boston, USA.


