Researchers use X-ray imaging to probe metal Additive Manufacturing process
June 1, 2018
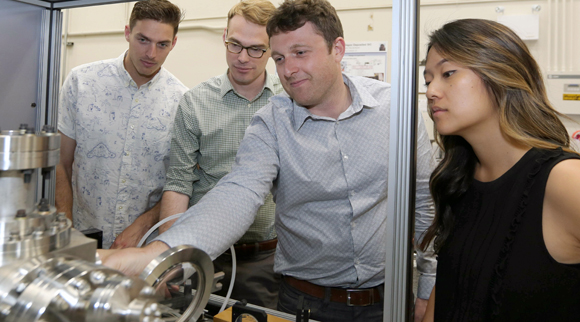
Researchers (from left) Phil Depond, Nick Calta, Aiden Martin and Jenny Wang are part of a multi-lab team that has successfully designed, built and tested a portable diagnostic machine capable of probing inside metal parts during AM (Courtesy Julie Russell/LLNL)
A team of researchers at Lawrence Livermore National Laboratory (LLNL), California, USA, has successfully designed, built and tested a portable diagnostic machine which uses X-ray imaging to ‘probe’ the inside of metal parts during laser Powder Bed Fusion (PBF), revealing many of the complex mechanisms that can drive defect formation and limit part quality in metal Additive Manufacturing. The research is being carried out in partnership with SLAC National Accelerator Laboratory and Ames Laboratory, funded by the USA Department of Energy’s Energy Efficiency and Renewable Energy (EERE) Advanced Manufacturing Office.
The portable diagnostic machine, capable of probing the melt pool, was developed and designed by LLNL researcher Nick Calta and his team. At the Stanford Synchrotron Radiation Lightsource at SLAC, researchers were then able to evaluate the method and successfully observe melt pool dynamics beneath the surface, providing researchers with new insights into the process. The research was published earlier this month in the Review of Scientific Instruments.
The instrument provides data on a combination of imaging and X-ray diffraction, allowing researchers to see how the metal solidifies, a key determiner of a part’s strength. Right away, the team was able to glean meaningful data which they are reportedly still in the process of analysing. “A vast majority of diagnostics use visible light, which are extremely useful but also limited to analysing the surface of the part,” explained Calta. “If we’re going to really understand the process and see what causes flaws, we need a way to penetrate through the sample. This instrument allows us to do that.”
“We’re getting information about the melt pool structure and what can go wrong during a build,” added LLNL physicist and Laser Materials Science group leader Ibo Matthews, who in recent years been developing experimental methods to understand the physics behind the laser fusion process. “The vapour plume created by the laser heating the melt pool can create pockets and pores. These pore defects can serve as stress concentrators and compromise the mechanical properties of the part.”
Matthews explained that the ability to see the layers formed at the melt pool and compare the X-ray images to simulations is confirming predictions of how the laser’s path, heat build-up and the gas plume caused by the laser can create defects. Combining this understanding with modeling and detailed experiments could help accelerate improvements and confidence in parts produced using metal AM.
“Success would be learning more about the physics in ways that let us modify the process to avoid defects,” Calta continued. “So far we’re getting promising results. We want to continue to optimise the instrument and apply it to different material systems. We already have a big body of knowledge based on optical data, this lets us branch out and complement that knowledge.”
While the collaboration is still in its initial stages, Calta stated that researchers have already begun mapping pore formation and extracting information on cooling rates. Eventually, the researchers want to exploit their flexibility to add optical diagnostics typically used on commercial machines to correlate with the X-ray imaging.
“You can’t tell what’s inside the box by looking outside the box,” Van Buuren stated. “The purpose of this project is to accelerate the adoption of AM for metallic components across the manufacturing sector by developing sophisticated in-situ tools to enable rapid process development of the AM components. With new materials, we don’t yet understand the properties and we need to be able to look at the process in real-time. It’s a bit different focus than what we usually do at the Lab. We want to build up a capacity that industry would come in and use.”


