MakerVerse and Zeiss showcase industrial AM quality assurance at Formnext
November 16, 2022
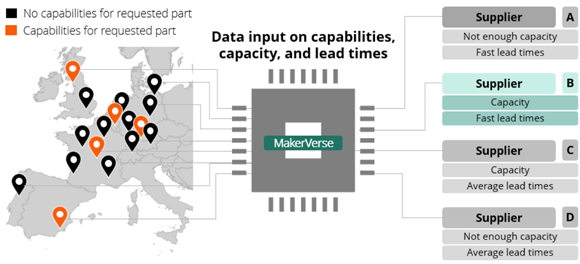
MakerVerse, Berlin, Germany, and Zeiss, headquartered in Oberkochen, Germany, are showcasing the range of dimensional, surface and material property-related inspection reports available to users of the MakerVerse platform. MakerVerse offers an Additive Manufacturing platform for sourcing industrial-grade parts on demand, and now includes Zeiss’s metrology technology.
“We know how important quality is for our customers in need of Additive Manufacturing parts. That’s why we’re thrilled to share this offering,” stated Dr Markus Seibold, CEO of MakerVerse. “Integrating Zeiss Quality Excellence Centers to our manufacturing partner network is the perfect solution for our customers needing industrial-grade quality inspections and reports for their AM parts.”
On the MakerVerse platform, users receive an instant quote after uploading their design and choosing the necessary AM technology, material and finish. Users can select the options provided by Zeiss, including:
- Optical 3D Scan: Non-contact measurements by using structured blue light, delivering three-dimensional measuring data quickly and precisely. Users receive a comparison of the dimensional properties and a digital twin of the physical part
- Tactile CMM: Users gain a precise measurement of dimensional part properties using a coordinate measurement machine (CMM) according to ISO 17025. This option is ideal for measuring several points with ultra-high precision. Users receive a report with the dimensional position of five points to compare with each other and the original design file
- Surface Roughness: A sensitive stylus measures the roughness of a portion of the part’s surface – which is then extrapolated for the entire surface. Users receive a report with the heights and valleys profile of a path of up to 50mm on one surface. Precision is reportedly better than 0.3 micrometres. Users also receive the computed Rz and Ra values per DIN ISO 4287
- Industrial CT- and X-Ray Solutions: The external and internal component properties are measured using a computed tomography system, checking the part for any potential pores, defects, errors, voids, or inclusions. Users receive the complete 3D tomographic data for inspection, three pass-through videos, and an expert report highlighting any abnormalities
These inspections are optional, but MakerVerse also includes additional quality checks with every order. Manufacturing application engineers inspect each part, taking basic dimensional measurements and determining if any issues with the final build need to be remedied.
MakerVerse and Zeiss are at Formnext in Hall 12.1, D101.


