Fraunhofer ILT develops optimised powder jet for laser material deposition
March 9, 2018
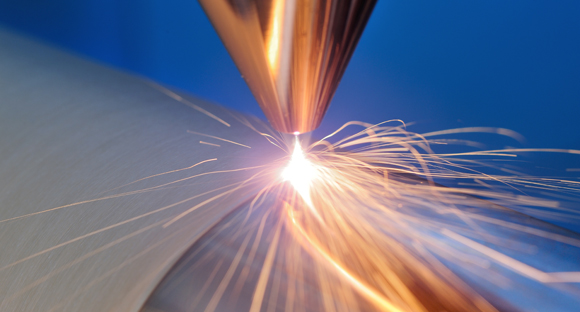
Laser material deposition is used in a variety of areas, including tool repair and the application of anti-corrosion coatings (Courtesy Fraunhofer ILT)
Engineers in the department of Process Control and System Technology at Fraunhofer Institute for Laser Technology (ILT), Aachen, Germany, state that they have developed an inline system for testing, qualifying and adjusting the focused powder jet of the nozzles of laser material deposition-based Additive Manufacturing systems.
With this system, nozzles can be certified and the caustic characterised completely. The user can also visualise and monitor the process using a camera module with integrated illumination.
Laser material deposition is used in a variety of areas, including tool repair and the application of anti-corrosion coatings. However, Fraunhofer ILT states that the process results depend considerably on how evenly the laser beam applies the powder to the targeted surface, and it can be difficult to optimally adjust the process parameters, such as the speed and volume of the powder feed into the melt pool, which plays a key role.
Nozzles and caustics must, therefore, be regularly checked, certified and calibrated before any laser material deposition is carried out. But the sequence of these steps has until now, according to the engineers, been very complex and cumbersome.
Graduate engineer Oliver Nottrodt, Project Manager for Process Control and System Technology at Fraunhofer ILT, stated, “An employee applies a powder trace on a metal sheet, which is then checked by an expert. But only a few specialists can perform this task in reproducible quality”.
The machine-supported inline system developed by the engineers consists of a camera module along with movable optics and illumination, all of which are mounted on the machining head. The nozzle is measured with a laser module, which is placed in the system.
The control of these two modules is then provided by electronics integrated either into a separate cabinet or the machine control cabinet. “For the documentation, it is important to know where the axes of the system are located. Their exact position can be transferred from the basic machine via common data bus interfaces,” explained Nottrodt.
In order to detect and measure the particle density distribution and caustics of the powder jet, the jet is illuminated with a laser line perpendicular to the powder gas flow and observed by the coaxially arranged camera through the powder nozzle. The system changes the relative position of the laser and the machining head several times for further measurements.
Finally, the evaluation of 2,000-3,000 images shows the statistical distribution of the particles in one plane. “If I use this method to gradually capture the so-called caustics – i.e. the focusing area in which the powder particle beam is bundled – it can be calculated and characterised very precisely in terms of the most important parameters, such as the minimum diameter and the density distribution,” Nottrodt continued.
The measuring system is said to be able to enable a user to measure and certify the powder feed nozzles and completely characterise the respective powder jet. It is also reported to help with process set-up by taking over a number of tasks from the user – such as measuring and marking the positions of the processing laser as well as documenting all work steps. In addition, the measuring system uses the geometric characteristics of the melt pool to monitor the laser metal deposition process, which it also visualises and documents.
Fraunhofer ILT will demonstrate the new technology at CONTROL 2018, Stuttgart, Germany, April 24-27, 2018. Engineers from the institute will be available at the joint booth of the Fraunhofer Alliance VISION 6302 in Hall 6 of the trade fair, where they will present a camera module with integrated lighting mounted on a typical working head and demonstrate how the laser module functions on the computer.


